
Every leather workshop generates waste. The offcuts left behind after cutting a wallet pattern, the narrow strips trimmed from a belt’s edge, the irregular remnants from an upholstery job — most people sweep these into a bin without a second thought. That’s a mistake, both economically and creatively.
Scrap leather projects are handcrafted items made from leather offcuts, remnants, or factory waste — typically pieces too small for standard production use but large enough for accessories, repairs, decorative work, and small goods. They span skill levels from beginner to advanced and represent one of the most material-efficient practices in modern craft.
This guide covers everything a serious crafter needs to know: how to classify and evaluate what you have, which projects suit which scraps, what tools the work actually requires, where sourcing mistakes bleed time and money, and how to turn leftover material into something worth selling.
What Exactly Counts as Scrap Leather?
Not all leftovers are equal, and the first thing any serious leather worker learns is that the word “scrap” covers an enormous range of material — from near-pristine remnants to genuinely unusable fragments. Understanding the distinction before you start cuts down on wasted effort considerably.
Leather offcuts typically originate from four sources: manufacturing facilities and tanneries, where irregular hide shapes leave large awkward remnants after panels are cut; upholstery and furniture workshops, which produce wide, flat pieces in varied thicknesses; shoe and accessory production lines, where die-cutting leaves punched-out shapes and strip offcuts; and home crafters’ own benches, accumulating piece by piece with every project.
Each source tends to produce scraps with different characteristics — upholstery leather runs thick and often chrome-tanned; shoe leather can be stiff with pre-applied finishes; tannery remnants are often the most versatile, arriving in a range of tempers and weights.
The Three-Tier Scrap Classification System
A practical way to organize any leather remnant collection before you start designing is to sort by size — not because size alone determines usefulness, but because it determines your range of options and prevents the common mistake of reaching for a piece that’s simply too small to execute the idea you had in mind.
Tier 1 remnants are pieces 12 inches or larger in at least one dimension. These are functionally equivalent to small leather panels and open up the full range of accessory work — wallets, watch straps, small pouches, journal covers.
Tier 2 offcuts fall between 4 and 12 inches. This is the most versatile and commonly available category: key fobs, card holders, coasters, dog collar panels, and eyeglass cases all fall comfortably within reach.
Tier 3 micro-scraps are anything under 4 inches. These require the most creative thinking but are far from useless — earrings, fringe accents, cord wraps, decorative inlays, and burnishing test strips all rely almost entirely on material this small.
This classification isn’t about discarding anything. It’s about matching the material to a realistic project before you commit hours of work to a design the scrap can’t support.
The Best Scrap Leather Project Ideas, Organized by What You Have
The most common frustration in leather offcut work isn’t lack of skill — it’s starting with the wrong piece for the intended project. Organizing ideas by scrap size rather than by project category solves this problem at the root. You open your bin, assess what you’re holding, and immediately know your realistic options.
Projects for Micro Scraps (Under 4 Inches)
Small doesn’t mean limited. Some of the highest-margin leather goods sold on handmade marketplaces are made entirely from material most crafters throw away.
Leather earrings are the obvious example: a single 3×3-inch piece of vegetable-tanned or chrome-tanned leather, punched or hand-cut into geometric shapes, sanded, dyed, and sealed, produces a pair that retails for $15–40 with material costs under a dollar. Tassel keychains, decorative fringe accents for bags and jackets, cable and cord wraps, bookmark corners, and patch appliqués for denim all live comfortably in this size range.
The tools required at this scale are minimal — a rotary punch, a sharp craft knife, and basic edge tools handle the majority of micro-scrap work. This makes it the most accessible entry point for anyone new to working with leather.
Projects for Mid-Size Offcuts (4–12 Inches)
This is where most leather remnant collections are richest, and where the widest variety of genuinely useful items becomes possible.
Key fobs and key organizers are perennial favorites: structurally simple, fast to produce, and consistently sellable. Business card holders and minimalist coin purses require slightly more precision but remain well within reach of anyone with basic cutting and stitching skills. Leather coaster sets — particularly effective when cut from thick upholstery remnants — are both practical and visually striking. Dog collar panels, luggage tags, cable organizers, and small glasses cases also sit comfortably within this size range.
One note worth making here: mid-size offcuts are where leather type begins to matter more meaningfully. A 6-inch piece of top-grain vegetable-tanned leather is a genuinely premium material for a card holder. A 6-inch piece of corrected-grain genuine leather with a heavy plastic coating is structurally weaker and will show its limits faster. Sorting by type at this tier — not just by size — prevents disappointment.
Projects for Larger Remnants (12 Inches and Above)
Larger remnants invite more ambitious work, and this is where the gap between crafters who understand leather and those who don’t becomes visible. A bifold or trifold wallet, executed cleanly in a quality Tier 1 remnant, is indistinguishable in finish from one cut from a full hide.
Watch straps, custom-cut to wrist measurement, are among the most technically satisfying small projects a leather worker can produce. Tablet sleeves, leather-wrapped A5 journals, small clutch purses, and even narrow belts — all become realistic from a single well-chosen remnant.
Patchwork designs using multiple Tier 1 pieces are also worth mentioning here, though they require a more deliberate design process. Mixing grain directions, thicknesses, or tannage types within a single structural piece creates long-term durability problems. When the intention is a patchwork aesthetic, consistent leather type across the patches matters more than visual variety alone.
Decorative and Home Applications
Not every project needs to be a wearable or carried accessory. Leather has compelling applications in home décor that most guides overlook entirely, and offcuts are often ideally suited to them. Hardened vegetable-tanned leather — wetted, shaped, and allowed to dry under weight — produces rigid trays and vessel forms with a sculptural quality.
Plant pot wraps in neutral tan or cognac leather add warmth to any interior. Drawer pull replacements, framed leather stamping art, and decorative panels cut from larger patchwork layouts all translate remnant material into objects with genuine interior design value.
These applications tend to use leather in a way that showcases its tactile quality rather than its structural function — which makes the grade of the material less critical than its surface appearance. Even corrected-grain pieces with good color can work well in decorative contexts.
Types of Leather Scraps and the Projects They’re Actually Suited For
Treating all leather remnants as interchangeable is the single most common source of project failure among new crafters. The tannage, finish, fiber structure, and grade of a piece of leather determine not just how it looks, but how it responds to cutting, adhesive, stitching, dyeing, and long-term use. Getting this right before you start is the difference between a finished piece and a frustrating half-hour of wasted effort.
Full-Grain and Top-Grain Remnants
Full-grain leather — the top layer of the hide with the natural grain surface intact — is the most desirable scrap material available. Its tight fiber structure takes stitching cleanly, holds adhesive reliably, and develops a genuine patina over time. Offcuts from saddlery suppliers, premium upholstery shops, and artisan tanneries often fall into this category.
Top-grain leather, which has had the uppermost surface lightly sanded and a finish coat applied, is slightly less premium but remains highly workable and widely available. Both are suited to anything structural: wallets, watch straps, key fobs, and journal covers all benefit from the durability these grades provide.
Genuine and Corrected-Grain Leather
The term “genuine leather” is perhaps the most misleading in the industry — it sounds like a quality assurance but actually describes a lower-grade product. Genuine leather is made from the lower layers of the hide after the top-grain has been split away. It’s weaker, absorbs moisture unevenly, and doesn’t edge-finish as cleanly.
Corrected-grain leather adds a heavy embossed or printed surface to mask the fiber irregularity beneath. Both grades still have legitimate uses in decorative applications, no-stress accessories, or projects where appearance matters more than structural integrity — but they should not be used for items that will take daily handling stress.
Suede and Nubuck
Suede is produced from the flesh side of the hide — the buffed inner surface that gives it its characteristic soft nap. Nubuck achieves a similar texture from the grain side. Both handle very differently from smooth leather: they require different adhesives (contact cement works, but needs careful application to avoid bleed-through), their edges don’t burnish in the conventional way, and dyeing produces uneven results unless the piece is fully saturated.
For earrings, fringe, soft lining panels, and small pouches, suede offcuts are genuinely excellent. For stitched, structural work, they’re frustrating.
When to Set Bonded Leather Aside
Bonded leather — a composite material made from leather fiber dust and scraps bonded with polyurethane and pressed onto a backing — looks convincing on a store shelf but degrades rapidly in use. The delamination pattern, where the surface peels away from the backing in sheets, is familiar to anyone who has owned a bonded leather sofa for more than a few years.
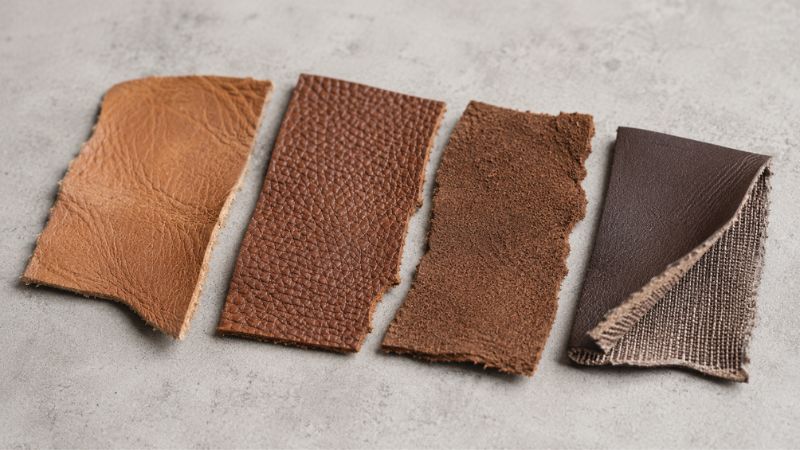
Bonded leather scraps are not worth the time investment for any project intended to last. They can function as burnishing test material or template guides, but building anything structural or wearable from them is a reliable path to disappointment. When evaluating unknown scraps, a flex test and an inspection of the back surface — bonded leather shows a fabric or mesh backing rather than a fibrous flesh side — will identify it quickly.
Specialty and Alternative Leathers
Cork leather, PU-based vegan leather, and fish leather (increasingly available through Scandinavian tanneries) occupy a growing niche and follow their own material logic. Cork leather is rigid, water-resistant, and best used in flat panel applications. Fish leather — salmon and perch skin are the most common — has a distinctive scale texture and surprising tear strength, making it excellent for accent panels and small accessories. PU vegan leather varies enormously in quality and handles more like fabric than leather; edge finishing and adhesive choices need to match the backing material rather than the surface.
Tools and Supplies You Actually Need
One of the most reliable ways to abandon a craft is to buy the wrong tools first. Leather working has a reputation for requiring extensive investment, but the reality for offcut and remnant work is considerably more accessible than the full tooling kits sold in craft stores suggest.
The Minimum Viable Toolkit
Four tools handle the majority of what beginner and intermediate leather offcut projects require: a rotary punch (for clean holes for rivets, snaps, and stitching), a pair of stitching chisels or pricking irons (for marking consistent stitch spacing), an edge beveler (which removes the sharp corner from cut edges and immediately elevates the professional quality of any finished piece), and a quality contact cement. With these four tools and a sharp craft knife, a cutting mat, and a metal ruler, a crafter can execute most of the projects in the mid-size and Tier 1 categories cleanly.
Beyond the basics, a wing divider or stitching groover adds stitch line precision. A swivel knife opens up leather tooling and carving. A bone folder or wooden slicker handles edge burnishing. These are genuine upgrades, not prerequisites.
| Tool | Primary Use | Approximate Cost |
| Rotary punch | Holes for rivets, snaps, stitching | $8–15 |
| Stitching chisels / pricking irons | Consistent stitch marking | $12–25 |
| Edge beveler | Clean, professional edges | $6–12 |
| Contact cement (Barge or equivalent) | Strong, flexible bonding | $8–20 |
| Wing divider / stitching groover | Stitch line guide | $10–18 |
| Cutting mat + metal ruler | Precise straight cuts | $15–30 |
| Swivel knife | Tooling and carving detail | $15–40 |
What You Can Make With No Tools at All
The barrier to entry for micro-scrap work in particular is genuinely low. No-sew leather earrings require only scissors and hole punch pliers available at any craft store. Braided leather bracelets need nothing but strips cut to length. Leather bookmarks can be hand-stamped with basic alphabet stamps and a mallet. The tool investment scales with the ambition of the project — and starting without tools is a legitimate and worthwhile approach for anyone testing whether the craft suits them.
Common Mistakes to Avoid in Leather Offcut Work
The most common mistake in working with leather remnants is treating all scraps as interchangeable. Leather type, grade, thickness, and tannage determine what a remnant can become — and ignoring these factors wastes both material and time. But there are six other recurring failure patterns worth understanding before you start.
Not Grading the Material Before Committing to a Design
Starting a project without evaluating the leather’s quality first is like building furniture from wood without checking for knots or warping. Flex the piece to check for stiffness and cracking. Inspect the back surface to identify whether it’s full-grain, split, or bonded.
Check the thickness with a gauge or by comparison — thin chrome-tanned garment leather and thick veg-tan saddle leather require different techniques, different tools, and different adhesives. Designing around the material rather than forcing the material to fit the design is the foundational discipline of quality leather work.
Ignoring Pattern Efficiency
Offcut work rewards thinking like a puzzle maker. Cutting without planning — drawing directly onto the leather and cutting freehand — wastes the usable surface in ways that become visible only after the piece is already cut.
The better approach is to trace all pattern pieces in paper first, then arrange them on the scrap surface before marking anything. For patchwork projects, a puzzle-cut strategy — nesting irregular shapes together to minimize waste between pieces — can dramatically extend how far a small remnant goes.
Using the Wrong Adhesive
Contact cement — Barge, Weldwood, or their equivalents — is the industry standard for leather bonding for good reason: it creates a flexible, durable bond that moves with the material rather than cracking under stress. Super glue creates brittle joints that fail along stress lines. PVA wood glue doesn’t penetrate leather’s dense fiber surface reliably. Hot glue leaves a visible residue and doesn’t hold under heat or sustained pressure.
The adhesive choice is rarely glamorous but almost always consequential: the right cement, applied in thin coats to both surfaces and allowed to reach the right tack before joining, produces a bond that outlasts the stitching.
Skipping Edge Finishing
Raw cut edges on leather immediately identify amateur work — not because they’re aesthetically offensive, but because an unfinished edge tells you everything about whether the maker understood the material. Finishing an edge properly — beveling the corner with an edge tool, then burnishing with a wooden slicker and gum tragacanth or tokonole, or applying edge paint in thin coats — takes three to five minutes per edge and transforms the perceived quality of any piece.
On vegetable-tanned leather, a burnished natural edge develops its own character over time. On chrome-tanned leather, edge paint is the cleaner solution. Neither option is difficult; both are non-negotiable for work worth presenting.
Mixing Incompatible Leather Types in One Structural Piece
Patchwork leather work is visually compelling but technically demanding. Combining pieces with significantly different thicknesses creates uneven surface planes and stitching tension problems. Mixing vegetable-tanned and chrome-tanned leather in a single item creates differential aging — one side patinas and softens while the other stays static, eventually pulling the piece out of shape.
Mixing leathers with different stretch characteristics causes warping under daily use. When patchwork is the intention, sort pieces by type and thickness before designing — visual variety works best when it’s achieved within a consistent material category.
Underestimating Dye and Finish Inconsistency
Leather from different sources, even when visually similar, absorbs dye at different rates. A patchwork piece dyed in a single session may emerge with three noticeably different shades if the component pieces came from different tannages.
The solution is to test dye penetration on a corner of each piece before committing to the full application, and to apply a finish or sealer uniformly across the complete assembled piece — which helps normalize the surface tone. The same principle applies to oil and conditioning treatments: what softens and enriches one piece may darken another.
Not Using Scraps as Practice Material First
This final mistake has a quiet irony to it. The entire premise of working with leather offcuts is using what would otherwise be wasted — and yet many crafters reach straight for the best piece they have when starting a new technique. The appropriate use of genuine micro-scraps (Tier 3 pieces with no clear project application) is exactly this: calibration. Practice stitching tension on a strip before touching the project piece. Test the contact cement open time on a small sample. Try the swivel knife technique on a corner before carving the main panel. The scraps exist to absorb mistakes; let them.
Where to Find Scrap Leather — Free, Cheap, and Online
Sourcing is the part of leather offcut work that most instructional guides treat as an afterthought — a short list of website names and a suggestion to “check locally.” In practice, sourcing decisions affect quality, cost, and the consistency of your material supply in ways that shape every project you undertake.
Free and Low-Cost Local Sources
Upholstery shops are the most overlooked and most generous source of free leather scraps available to most crafters. Shops that work with genuine leather upholstery regularly accumulate offcuts that have no commercial value to them and take up storage space — most will give these away freely if you ask. Shoe repair cobblers and cobblery suppliers hold similar inventories of small leather pieces in a range of thicknesses and finishes.
Saddle and tack shops often carry ends and irregular pieces from harness and equipment production. Thrift stores selling worn leather goods — bags, jackets, belts — offer another option: deconstruct the item and you recover usable panels, particularly from the back and sides of leather bags where wear is minimal.
Facebook Marketplace and local Craigslist listings regularly feature bulk leather lots from estate sales, retired crafters, or small manufacturing operations clearing inventory. These purchases carry more uncertainty than buying from a specialist supplier, but at low prices, the risk is proportionate.
Buying Remnant Packs Online
Several reputable suppliers sell curated leather scrap and remnant bags — mixed lots in specified weight or volume that provide a practical variety of material for project work. Tandy Leather’s remnant and scrap bags are the most widely available and represent a reasonable starting point.
Springfield Leather Company offers remnant packs organized by leather type, which is considerably more useful for anyone who needs material consistency. Rocky Mountain Leather Supply caters to more advanced crafters and carries a range of full-grain and exotic leather ends. Etsy also hosts individual leather sellers offering mixed lots, though quality control requires reading reviews carefully before purchasing.
One genuinely useful evaluation habit when buying blind online: request photos of the backs of pieces in the lot before purchasing. The flesh side or backing material immediately reveals the leather grade — and any seller unwilling to provide this photo is telling you something important about what they’re selling.
Building Your Own Supply
The most underutilized sourcing strategy is intentional waste management in your own practice. When purchasing larger leather panels for a planned project, design your cuts to maximize yield from the outset — nesting pattern pieces before cutting rather than after.
Every planned cut produces planned offcuts, which can go directly into a sorted storage system rather than a bin. Over time, even a modest leather practice accumulates a genuinely useful remnant supply organized by type, size, and color — the raw material for a parallel small-goods workflow that costs almost nothing.
What’s Actually Worth Selling From Leather Remnant Work
The commercial potential of leather offcut work is real, but it requires honest assessment of what the market actually values — and what it doesn’t. The crafters who build sustainable side income from remnant work are the ones who match project selection to margin reality, not just creative preference.
Highest-Margin Items from Remnant Material
Leather earrings represent the most favorable economics in the category. A single Tier 3 or small Tier 2 piece — material that cost cents, if anything — produces a finished pair that retails credibly between $18 and $45 on Etsy or at craft markets, depending on design complexity and finishing quality. The labor investment per pair, once technique is established, is 20–40 minutes. Key fobs and tassel keychains follow a similar logic: material cost near zero, retail price $10–25, production time short enough to batch effectively.
Minimalist card holders made from clean Tier 2 remnants carry genuine perceived value — buyers understand they’re getting a quality leather product — and retail between $20 and $45 depending on finish and hardware quality.
These three categories share a characteristic that makes them commercially viable from scraps: small size means material consistency is easy to maintain across a production batch, and the low material cost means the margin is almost entirely determined by the selling price.
What Doesn’t Scale Well From Remnants
Honesty here is more useful than encouragement. Full wallets assembled from patchwork remnants are technically achievable but commercially difficult — buyers at the price point where leather wallets sell well expect visual and material consistency that patchwork inherently compromises.
Large bags from mixed remnants face the same problem, compounded by structural demands that inconsistent leather types handle poorly. These are excellent personal projects and genuine creative exercises, but they require either premium remnant material with consistent characteristics or a willingness to sell at a lower price point that reflects the patchwork aesthetic honestly.
Selling Platforms and Practical Considerations
Etsy remains the most accessible platform for handmade leather goods, with a buyer base that actively seeks leather accessories and responds well to narrative about craft process and material sourcing. Photography is disproportionately important at small product scales — leather earrings and key fobs are small objects that photograph beautifully against clean, minimal backgrounds with natural side lighting.
Craft markets and artisan fairs offer the advantage of direct handling, which matters enormously for leather goods where texture is part of the value proposition. Pricing should reflect material, labor, overhead, and platform fees, not just material cost alone — the most common pricing mistake among new sellers is anchoring to what the raw material cost rather than what the skilled labor time is worth.
Leather Remnants, Sustainability, and the Circular Craft Economy
The sustainability argument for leather offcut work is more nuanced than it first appears, and understanding it honestly makes the case more compelling, not less.
Leather production is resource-intensive: the tanning process uses significant water and chemical inputs, and the hide itself is a by-product of the meat industry with its own environmental accounting. These facts are real and shouldn’t be dismissed. But they’re also the argument for using every usable part of what’s already been produced.
A leather scrap that ends up in landfill represents wasted investment — energy, water, and material that’s already been consumed — without delivering the full value the material could provide. Using remnants extends the productive life of material already in existence, which is the most resource-efficient position available within the system as it currently operates.
The Scrap Hierarchy
A practical framework for thinking about remnant material — modeled loosely on the waste management hierarchy — organizes choices from most to least valuable use:
The highest use is repurposing: turning functional leather waste into new functional objects. Below that is upcycling: combining remnant pieces into new material forms, like patchwork panels used as raw material for larger projects.
Repair sits at the same tier: using leather scraps to extend the life of existing goods — resoling shoes, patching bags, replacing worn straps — is among the highest-value applications of small remnant material.
Donation to other crafters, leather guilds, or school programs follows. Landfill disposal sits at the bottom, reserved for genuinely degraded material — bonded leather in advanced delamination, heavily chemical-contaminated scraps — where no productive use remains.
This hierarchy isn’t moralistic; it’s practical. It gives any craftsperson a decision framework for the material in front of them rather than a binary choice between “use it” and “throw it away.”
FAQs About Scrap Leather Projects
What can I make with very small leather scraps?
Small leather remnants under 4 inches are well-suited for earrings, tassel keychains, bookmarks, cord wraps, and decorative patch appliqués. Even pieces under 2 inches have practical uses as inlay accents, burnishing test material, or fringe tips. The key is sorting by size before deciding on a project rather than forcing a piece into a design it can’t support.
Is it worth saving leather scraps, or should I discard them?
Full-grain and vegetable-tanned remnants are worth saving indefinitely — they age well, remain workable for years, and have genuine value for future projects. Bonded leather scraps are rarely worth storing beyond use as template guides. A sorted, labeled storage system organized by type and size turns a random pile into a usable material library.
Can you actually make money selling projects made from leather scraps?
Yes, particularly with small accessories. Leather earrings, key fobs, and minimalist card holders made from offcut material carry material costs under a dollar per unit and retail between $15 and $45, making them among the most favorable margin structures in handmade goods. Consistency in finish quality and photography investment are the primary factors separating profitable sellers from occasional hobbyists.
What’s the best adhesive to use for leather scrap projects?
Contact cement — Barge All-Purpose Cement or Weldwood are the industry standards — provides the most reliable bond for most leather applications. It’s applied in thin coats to both surfaces, allowed to reach tack, then joined under pressure. Avoid superglue (brittle joints), hot glue (fails under heat and pressure), and standard PVA (poor penetration on dense leather surfaces).
How do I identify whether a leather scrap is good quality before starting a project?
Flex the piece: quality leather returns to shape without cracking or surface fracturing. Inspect the back — a tight, fibrous flesh surface indicates genuine full or top-grain leather, while a fabric or mesh backing identifies bonded leather. Consistent surface color without heavy plastic coating suggests minimal correction and better workability.
What’s the smallest leather scrap worth keeping?
Pieces as small as one square inch have legitimate uses as burnishing test material, inlay details, or fringe tips. For standalone projects, the practical minimum is approximately 3×3 inches — enough for a simple earring pair or the smallest bookmark format. Anything smaller can be kept in a separate container specifically for testing adhesives, dyes, and tool settings.
Wrapping Up
Leather scraps are not an afterthought — they’re a material category in their own right, with their own logic, hierarchy, and commercial potential.
What separates productive remnant work from frustrating trial-and-error is a simple shift: evaluate before you cut. Know the grade, the tannage, the size, and the realistic project range before committing a single tool to the surface.
The best projects aren’t the most ambitious ones. They’re the ones matched honestly to what the material can do — a clean card holder from a quality Tier 2 offcut will outlast and outsell a poorly executed patchwork bag every time.
Mistakes in this craft are almost always upstream decisions: wrong adhesive, wrong leather type for the project, skipped edge finishing. Fix the decision, and the execution follows naturally.
If there’s one principle worth carrying forward, it’s this — treat every scrap as a graded resource, not a leftover. That single reframe changes how you sort, store, design, and ultimately what you make.
The material has already been produced. The craft is simply in using it well.