
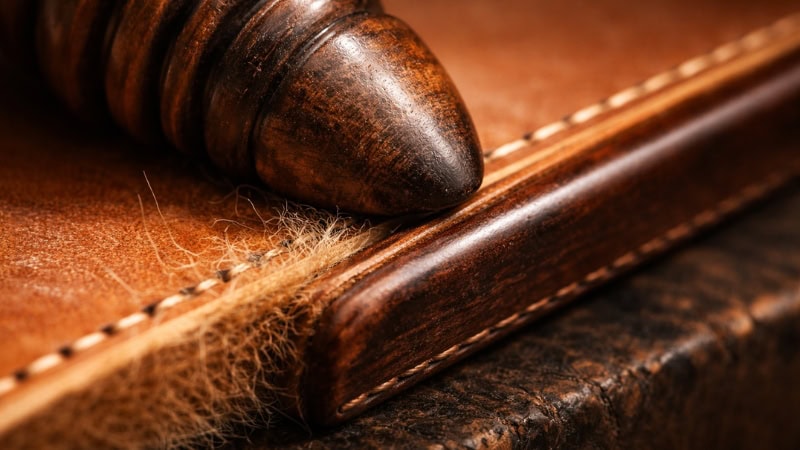
Burnishing leather edges is one of those small details that separates amateur work from professional craftsmanship. If you’ve ever admired a clean, glossy leather wallet edge or a perfectly finished belt, you were looking at well-burnished leather.
At its core, burnishing is the process of smoothing and sealing the raw edges of leather through friction, moisture, and, sometimes, specialized compounds. It not only improves the visual appeal but also strengthens the edge, preventing fraying and wear over time.
Whether you’re a beginner in leathercraft or someone looking to refine your edge finishing technique, understanding how to burnish leather edges properly is essential. In this guide, you’ll learn the materials, tools, and exact step-by-step process used by professionals—along with practical insights that help you avoid common mistakes.
What Is Leather Edge Burnishing?
Burnishing leather edges is a finishing technique that uses friction and compression to seal exposed leather fibers, creating a smooth, polished edge. Instead of leaving edges rough or fibrous, burnishing transforms them into a dense, glossy surface.
Understanding the Burnishing Process
When leather—especially vegetable-tanned leather—is cut, its edges expose loose fibers. Through controlled friction (using tools such as a wooden burnisher or cloth) and slight moisture, these fibers are compressed and bonded together. This process generates mild heat, which helps natural oils in the leather bind the fibers into a cohesive edge.
Burnishing vs Edge Painting
Burnishing is often confused with edge painting, but they serve different purposes. Burnishing enhances the leather’s natural structure, while edge painting coats the edges with synthetic layers. For traditional leathercraft, burnishing is preferred because it maintains the organic look and feel of the material.
Role of Burnishing Compounds
Substances such as gum tragacanth and Tokonole are commonly used to enhance burnishing. These compounds act as binding agents, helping fibers lay flat more efficiently and resulting in a smoother finish.
In essence, burnishing is both a functional and aesthetic process—improving durability while elevating the craftsmanship of leather goods.
Types of Leather Suitable for Burnishing
Not all leather responds the same way to burnishing. Choosing the right leather type is critical if you want smooth, professional-looking edges.
Vegetable-Tanned Leather (Best Choice)
Vegetable-tanned leather is widely considered the best leather for burnishing. Its natural fiber structure is dense and responsive to moisture and friction, allowing the edges to compress and polish effectively. This is why most traditional leatherworkers rely on veg-tan leather for projects that require clean edge finishing.
Chrome-Tanned Leather (Limited Results)
Chrome-tanned leather, on the other hand, is softer and more flexible due to chemical processing. While it is durable for many applications, it does not burnish well. The fibers tend to resist compression, often resulting in fuzzy or uneven edges. In most cases, edge painting is a better alternative for chrome-tanned leather.
Full-Grain vs Top-Grain Leather
Full-grain leather retains the strongest fiber structure, making it highly suitable for burnishing. Top-grain leather can also be burnished, but results may vary depending on surface treatment.
Leather Types to Avoid
Suede and nubuck are not suitable for burnishing because their fiber structures are intentionally soft and textured. Attempting to burnish them typically leads to poor results.
Understanding these differences ensures you’re working with the right material from the start—saving time and frustration.
Tools and Materials Needed
Having the right tools and materials is essential for achieving consistent, high-quality burnished edges. While you can start with basic equipment, professional results often depend on precision tools and proper compounds.
Essential Leather Burnishing Tools
A wooden burnisher is the most common tool used in leather edge finishing. Its grooved design allows you to apply controlled friction across different edge thicknesses. For beginners, even a simple canvas cloth can be used as an alternative, though it requires more effort.
An edge beveler is equally important. Before burnishing, sharp edges should be rounded slightly to allow smoother compression. Skipping this step often leads to uneven or rough finishes.
Sanding and Preparation Materials
Sandpaper plays a critical role in the process. Using progressive grits—such as 220, 400, and 800—helps refine the edge surface before burnishing begins. Proper sanding ensures that fibers are aligned and ready for compression.
Burnishing Compounds and Agents
Compounds like gum tragacanth and Tokonole are widely used to improve results. Gum tragacanth is a natural plant-based resin that helps bind fibers, while Tokonole is a modern Japanese product known for producing smoother, more polished finishes.
Beeswax and saddle soap can also be used to seal and enhance the final edge, adding durability and a subtle sheen.
Manual vs Motorized Tools
For advanced users, tools such as a Dremel burnisher or a drill-mounted burnishing wheel can speed up the process. These motorized options are ideal for larger projects but require careful control to avoid overheating or damaging the leather.
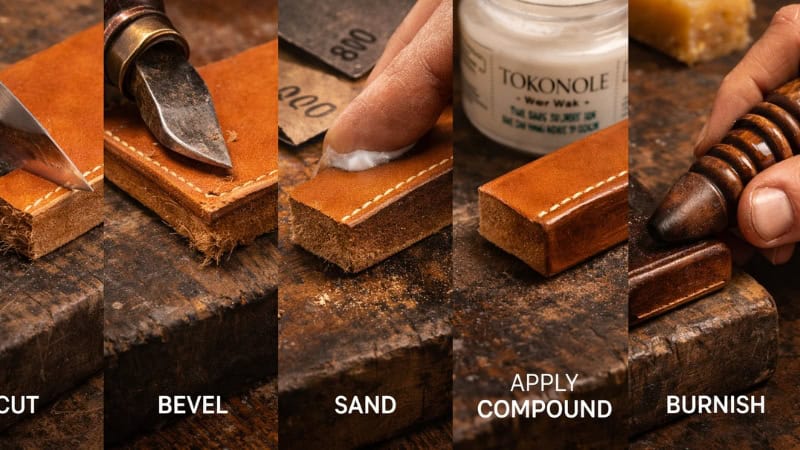
Step-by-Step Guide to Burnishing Leather Edges
Burnishing leather edges is a process that rewards patience and precision. Each step builds on the previous one, so skipping or rushing can significantly affect the final result.
Edge Preparation and Trimming
Before anything else, ensure your leather edges are clean and even. If multiple layers are glued together, they must be perfectly flush. Uneven edges will remain visible even after burnishing, so trimming with a sharp knife or edge tool is essential.
Edge Beveling for Smooth Transitions
Using an edge beveler, remove the sharp corners from both sides of the leather edge. This creates a rounded profile that allows fibers to compress more uniformly during burnishing. Without beveling, edges often appear bulky or inconsistent after finishing.
Progressive Sanding Technique
Sanding is where the foundation of a smooth edge is built. Start with a lower grit, like 220, to remove imperfections, then move to finer grits such as 400 and 800. Each stage further refines the surface, aligning fibers and eliminating roughness.
A well-sanded edge should feel smooth even before any burnishing agent is applied. This step is often overlooked, but it directly determines how polished your final edge will look.
Applying Moisture or Burnishing Agent
At this stage, you introduce a binding element. This can be plain water, gum tragacanth, or Tokonole, depending on your preference and desired finish.
Water is the simplest option and works well for basic projects. Gum tragacanth provides better fiber control, while Tokonole offers a more refined, professional finish. Apply a small amount evenly across the edge—over-saturating can weaken the structure.
Friction and Heat: The Burnishing Action
Using a wooden burnisher, canvas cloth, or motorized tool, begin rubbing the edge with consistent pressure. The goal is to generate friction, which produces mild heat and compresses the fibers.
Maintain steady, controlled motion rather than aggressive force. As you continue, you’ll notice the edge becoming darker and smoother—this is a sign that fibers are bonding properly.
Sealing with Wax or Finishing Agents
Once the edge is smooth, applying beeswax helps seal and protect it. The wax fills any remaining micro-gaps and enhances durability. Lightly re-burnish after applying wax to integrate it into the edge.
Final Polishing and Inspection
Finish by buffing the edge with a soft cloth. This step enhances the sheen and ensures a uniform appearance. A properly burnished edge should feel slick to the touch and show a subtle, consistent shine.
Taking the time to execute each step carefully is what separates average results from truly professional leather edges.
Best Burnishing Compounds Compared
Choosing the right burnishing compound can significantly influence the final appearance and durability of your leather edges. Different compounds offer varying levels of control, finish quality, and ease of use.
Gum Tragacanth (Traditional Choice)
Gum tragacanth is a natural resin widely used in traditional leathercraft. It helps bind leather fibers effectively, making it easier to achieve a smooth edge. It’s especially popular among beginners because it’s forgiving and relatively easy to work with.
While it produces good results, the finish may not be as refined or glossy as those of more modern alternatives.
Tokonole (Professional Standard)
Tokonole is a Japanese burnishing compound that has gained popularity for its superior performance. It spreads evenly, requires less effort, and produces a noticeably smoother, more polished finish.
Many professional leatherworkers prefer Tokonole because it works consistently across different projects and enhances both texture and appearance.
Beeswax and Saddle Soap (Finishing Enhancers)
Beeswax is commonly used as a final sealing agent rather than a primary burnishing compound. It adds durability and a subtle sheen. Saddle soap, on the other hand, can help smooth edges while conditioning the leather.
Choosing the Right Compound
For beginners, gum tragacanth is a reliable starting point. For more advanced or professional results, Tokonole is often the better choice. Beeswax works best as a finishing layer regardless of the primary compound used.
Common Mistakes to Avoid
Even with the right tools and materials, certain mistakes can prevent you from achieving clean, polished leather edges. Recognizing these issues early can save time and significantly improve your results.
Skipping Proper Sanding
One of the most common mistakes is rushing through sanding or skipping it altogether. Without a smooth base, burnishing cannot effectively compress fibers, resulting in rough or uneven edges.
Using Too Much Moisture
Over-wetting the edge—whether with water or a burnishing compound—can weaken the leather structure. Instead of compressing, fibers may become mushy and fail to bind properly.
Choosing the Wrong Leather Type
Attempting to burnish chrome-tanned leather often leads to frustration. Its fiber structure does not compress well, making it difficult to achieve a smooth finish.
Applying Uneven Pressure
Inconsistent pressure during burnishing can create patchy or streaky edges. Maintaining steady, controlled motion is key to achieving uniform results.
Rushing the Process
Burnishing requires patience. Trying to speed through the steps often results in subpar edges that lack durability and visual appeal.
Avoiding these mistakes ensures a more consistent and professional outcome.
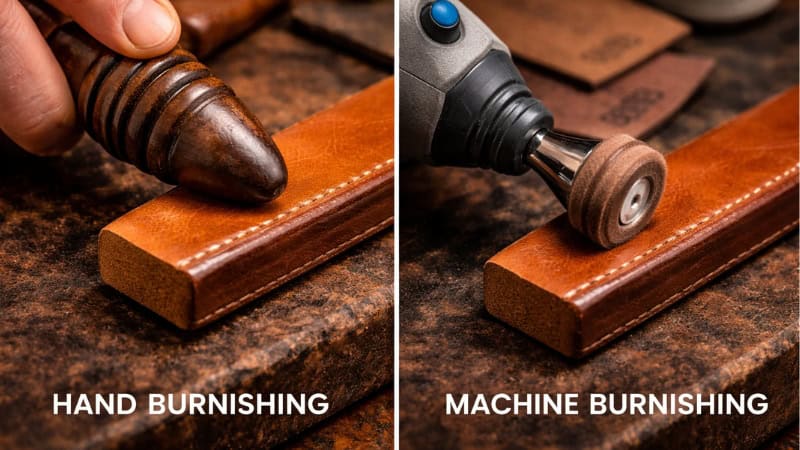
Hand Burnishing vs Machine Burnishing
Both hand and machine burnishing methods can produce excellent results, but they differ in terms of control, speed, and suitability, depending on the project.
Hand Burnishing (Control and Precision)
Hand burnishing, using tools like a wooden slicker or canvas cloth, offers greater control over pressure and movement. This makes it ideal for beginners and for detailed work where precision is essential.
It allows you to feel how the leather responds as you work, which is valuable for developing technique.
Machine Burnishing (Speed and Efficiency)
Machine burnishing uses tools such as a Dremel or a drill-mounted burnisher to generate friction quickly. This method is especially useful for larger projects or production work where efficiency matters.
However, machine burnishing requires experience. Excessive speed or pressure can overheat the leather, potentially damaging the edge.
Choosing the Right Approach
For beginners, hand burnishing is recommended to build skill and control. For experienced leatherworkers or high-volume work, machine burnishing can significantly reduce time while maintaining quality.
Pro Tips for Perfect Leather Edges
Achieving perfectly burnished leather edges consistently requires more than just following the basic steps. Small refinements in technique often make the biggest difference in final results.
Layering and Multiple Passes
Professional leatherworkers rarely rely on a single burnishing pass. Instead, they build the edge gradually—alternating between light sanding, applying compound, and burnishing. This layering technique creates a denser, smoother edge over time.
Combining Edge Dye and Burnishing
Applying edge dye before burnishing can enhance both color depth and finish quality. When followed by burnishing, the dye integrates into the fibers, producing a richer and more uniform appearance.
Controlling Environment and Moisture
Humidity and temperature can influence how leather responds. Slightly damp—not wet—conditions work best. Controlling moisture levels ensures fibers compress properly without becoming overly soft or unstable.
FAQs on Leather Edge Burnishing
Can you burnish leather without gum tragacanth?
Yes, you can burnish leather using just water. While gum tragacanth or Tokonole improves efficiency and finish quality, water alone can still produce decent results—especially on vegetable-tanned leather.
How long does burnishing last?
When done correctly, burnished edges are highly durable and can last for years. Applying beeswax or a finishing agent further enhances longevity by protecting the edge from moisture and wear.
Can you fix poorly burnished edges?
In most cases, yes. You can re-sand the edge to remove imperfections and repeat the burnishing process. However, severe mistakes—such as over-saturation—may require more extensive correction.
Why do my leather edges still look rough?
Rough edges are usually caused by insufficient sanding, uneven pressure, or using unsuitable leather like chrome-tanned hides. Improving preparation steps often resolves this issue.
Is Tokonole better than gum tragacanth?
Tokonole generally produces smoother, more consistent results and requires less effort. However, gum tragacanth remains a reliable and cost-effective option for many leatherworkers.
Mastering Leather Edge Burnishing for Long-Lasting, Professional Results
Burnishing leather edges is a foundational skill that significantly enhances both the appearance and durability of leather goods. By understanding the materials, using the right tools, and following a structured process, you can transform rough edges into smooth, professional finishes.
The key lies in preparation, patience, and technique. From selecting vegetable-tanned leather to applying the right burnishing compound and refining your method over time, each step contributes to the final result.
With consistent practice and attention to detail, burnishing becomes more than just a finishing step—it becomes a defining element of quality craftsmanship.
