
Leatherworking is a craft that requires both skill and care. Whether you’re restoring an old leather bag, customizing your favorite jacket, or simply working on a leather project, sometimes you might need to remove rivets. Rivets are tough, reliable, and used to reinforce leather, but they can be tricky to remove without damaging your project.
In this guide, we’ll walk you through everything you need to know about removing rivets from leather. From understanding the types of rivets to step-by-step methods and post-removal care, we’ve got you covered.
Dig Deeper: Different Types of Leather Rivets and Their Uses

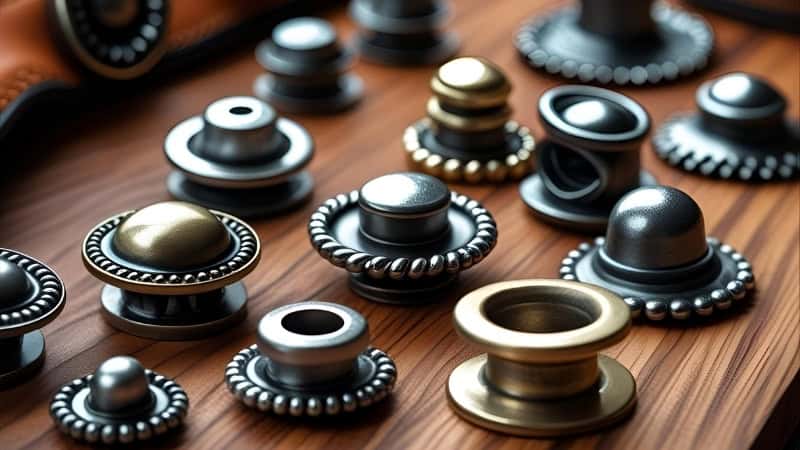
Understanding Rivet Types and Their Characteristics
Before you start prying out rivets, it’s important to know what you’re working with. Not all rivets are created equal. Here are the most common types you’ll encounter in leather projects:
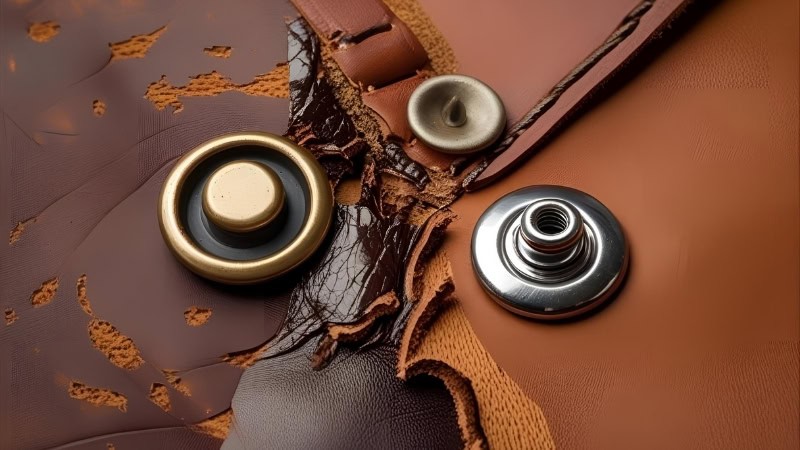
Double-Cap Rivets
These are the classic rivets you see on bags, wallets, and jackets. Double-cap rivets have a top and bottom that hold the leather tightly in place.
- Challenges: Removing them can be tricky because of their tight grip, but with the right tools, you can manage it.
Tubular Rivets
Tubular rivets are hollow in the middle and commonly used in heavy-duty leatherwork. They’re great for thicker leather, but they can be stubborn to remove.
- Challenges: They are stronger than other rivets, and you might need a more aggressive method to remove them.
Copper and Brass Rivets
These rivets are known for their durability and aesthetic appeal. They’re often found on bags and wallets for decorative purposes.
- Challenges: While strong, copper and brass can corrode over time. If you don’t remove them properly, they might leave behind residue.
Decorative Rivets
These are primarily used for looks. You see them on belts, purses, or clothing items. They add style but can be a pain if you need to remove them without causing damage.
- Challenges: Because they’re mostly decorative, they can be weaker and easier to remove, but their thinness might mean more risk of leather damage if you’re not careful.
Dig Deeper: The Ultimate Leatherworking Tools List for Everyone
Essential Tools for Rivet Removal
You can’t remove rivets properly without the right tools. Think of it like trying to fix a car engine without a wrench. Not only would it be frustrating, but you might end up damaging your precious leather. Here’s what you’ll need:
Basic Tools
- Pliers (needle-nose or end-cutting): For pulling out stubborn rivets, gripping tightly and twisting to loosen.
- Screwdrivers (flathead): Perfect for prying out the rivet top if it’s set too tight.
- Hammers or Mallets: Sometimes, a gentle tap is all it takes to loosen the rivet.
Specialized Tools
- Rivet Removal Tool: If you’re into leatherworking long-term, this tool can save you hours. It’s specifically made to pop rivets without causing damage.
- Drill with Bits: If you’re dealing with particularly stubborn rivets, drilling them out carefully can be your best bet.
- Punching Block: If you need precision, a punching block provides a steady base to remove rivets cleanly.
Safety Gear
- Protective Gloves: Don’t risk a nasty cut. Gloves will keep your hands safe while working with sharp tools.
- Safety Goggles: Especially important when drilling. You don’t want flying metal bits in your eyes.
- Dust Mask: If you’re drilling or grinding, protect your lungs from any debris.
Step-by-Step Guide to Removing Rivets
Now that you’ve got the tools, let’s dive into the removal process. Here’s a simple, foolproof way to get those rivets out without harming your leather.
1. Preparation Is Key
Before jumping in, take a moment to assess the rivet you’re dealing with. Not all rivets are the same, and the method you use will depend on their type.
- Assess the Rivet Type: Identify if it’s a double-cap, tubular, copper, brass, or decorative rivet.
- Choose the Right Tools: Match the rivet type with the right tool (rivet removal tool, pliers, drill, etc.).
- Set Up a Stable Work Surface: You don’t want your leather slipping around while you work. Lay it flat on a hard surface.
2. Using a Rivet Removal Tool
If you’re using a specialized rivet removal tool, it’s pretty straightforward. This tool is designed for precision and is your best bet for minimizing leather damage.
- Align the tool over the rivet.
- Apply gentle, controlled pressure to remove the rivet.
- This method is great for keeping the leather intact.
3. Manual Techniques
If you don’t have a rivet removal tool, don’t worry! You can still get the job done with a few common tools.
Using Pliers
- Grip the rivet tightly with needle-nose or end-cutting pliers.
- Twist and pull slowly. Sometimes the rivet will loosen, but don’t force it.
Drilling
- Select a drill bit that’s the same size or slightly larger than the rivet.
- Drill through the rivet center to break it apart. Be careful not to overheat the leather.
- Low-speed drilling works best.
Using a Punch and Hammer
- Place the punch at the back of the rivet.
- Tap gently with a hammer to push the rivet out.
- This method is great for rivets that have a clear backside.
Post-Removal Care and Leather Maintenance
Removing a rivet can leave your leather looking a bit rough around the edges. Here’s how to clean up and keep it in top condition after the removal:
Recommended Read: Best Way to Clean Leather: The Ultimate Leather Cleaning Guide
Cleaning the Leather
After removing the rivet, you’ll want to clean the area.
- Remove Metal Shavings: These can be sharp and damaging to the leather. Wipe the area carefully with a soft cloth.
- Damp Cloth: Clean the leather gently with a damp cloth to remove any remaining dust.
Recommended Read: How to Condition Leather the Right Way
Conditioning the Leather
Leather can dry out when rivets are removed, so it’s essential to bring back its softness.
- Apply a leather conditioner to restore moisture.
- Be cautious with the amount—over-conditioning can lead to leather becoming too soft and prone to damage.
Repairing Damage
Sometimes, rivet removal can cause small punctures in the leather. If this happens, don’t panic.
- Use Leather Filler: Fill small punctures or tears with leather filler.
- Reinforce with Stitching: If the removal leaves a hole that needs extra attention, you might want to stitch it up for strength.
Troubleshooting Common Issues
Removing rivets doesn’t always go according to plan. Here are a few common problems and how to solve them.
Rivet Won’t Budge
- Penetrating Oil: Apply it to the rivet and let it sit for a few minutes. This helps loosen any rust or debris.
- Heat: Carefully heat the rivet with a heat gun. This will expand the metal, making it easier to remove.
Leather Getting Damaged
- Always use scrap leather beneath the rivet to protect the rest of your project.
- Don’t apply too much force. If you’re struggling, try a different method.
Incomplete Rivet Removal
Sometimes, parts of the rivet can remain stuck in the leather.
- Use a punch to push out remaining fragments.
- Carefully drill out the center if necessary.
Preventative Measures for Future Projects
You don’t want to go through the hassle of rivet removal again, so here are some tips to prevent issues from cropping up in the future.
Choosing the Right Rivet
- Consider your leather’s thickness and the purpose of the rivet.
- If you expect to make adjustments in the future, opt for rivets that are easier to remove.
Proper Installation
- Use the right tools to install rivets without over-tightening.
- Test the rivet’s strength before finalizing your project.
Regular Maintenance
- Inspect rivets regularly for signs of loosening or corrosion.
- Address problems early to avoid major damage down the road.
FAQs About Removing Rivets from Leather
1. What’s the easiest way to remove rivets from leather without damaging it?
The easiest and safest way is by using a rivet removal tool. This tool is designed specifically for rivet extraction, minimizing the risk of damaging your leather. If you don’t have one, carefully using pliers or a punch and hammer can also work, but be gentle and patient.
2. Can I remove rivets with regular household tools?
Yes, you can! Household tools like needle-nose pliers, flathead screwdrivers, and even a hammer can be used to remove rivets. However, they require more precision, and you might risk damaging the leather if you’re not careful.
3. How do I remove rivets that are stuck or rusted?
For rusted or stuck rivets, try using penetrating oil. Apply the oil and let it sit for a few minutes to loosen the rust. If that doesn’t work, you can also use heat from a heat gun to expand the metal, making it easier to remove.
4. What do I do if the rivet leaves a hole in the leather?
If a hole is left behind after removing a rivet, you can repair it with leather filler. If needed, you can also reinforce the area with stitching to make the leather more durable. Always condition the leather afterward to keep it soft and supple.
5. Can I reuse rivets after removing them?
It’s generally not recommended to reuse rivets once they’ve been removed. Most rivets lose their structural integrity when taken out, so they may not hold as securely the second time around. It’s usually better to replace them with fresh rivets.
6. Is it possible to remove decorative rivets without damaging the leather?
Yes, decorative rivets are typically easier to remove compared to structural rivets. Use pliers or a flathead screwdriver to gently pry them off. Be sure to work slowly and carefully to avoid scuffing or tearing the leather.
7. How can I prevent rivets from loosening in the future?
To prevent rivets from loosening, make sure they are installed properly using the right tools. Tighten them just enough—not too tight, as that can cause stress on the leather. For extra security, consider using removable rivets or periodically check the rivets for any signs of wear.
Remove Rivets from Leather Harming None
Removing rivets from leather doesn’t have to be a nightmare. With the right tools, the proper technique, and some patience, you can do it without damaging your project.
Whether you’re restoring a piece of leather or just experimenting with your craft, knowing how to remove rivets safely is an essential skill for any leatherworker. And you can do it without harming the leather or the rivet.
Just, take your time, plan carefully, and give your leather the care it deserves.
