
Adding a leather patch is one of the simplest ways to refresh a favorite jacket, tote, or pair of jeans. It’s a small touch that instantly adds personality and texture—whether you’re covering a tear, showcasing a logo, or creating a custom look.
While leather has a reputation for being tricky to work with, applying a patch doesn’t have to be complicated. With a little preparation, the right tools, and steady heat, you can achieve a smooth, durable bond that looks like it came from a professional shop.
This guide walks you through the entire process step by step—from gathering your materials to perfecting the finish—so you can confidently attach a leather patch that lasts and looks great.
Gather Materials
Before you dive in, set yourself up for success. A few simple tools make the job cleaner, quicker, and safer for both your patch and your garment.
Start with a quick check – does your patch have a heat-activated adhesive on the back? If yes, you’re good. If not, you’ll need a separate fusible adhesive or consider stitching later for reinforcement.
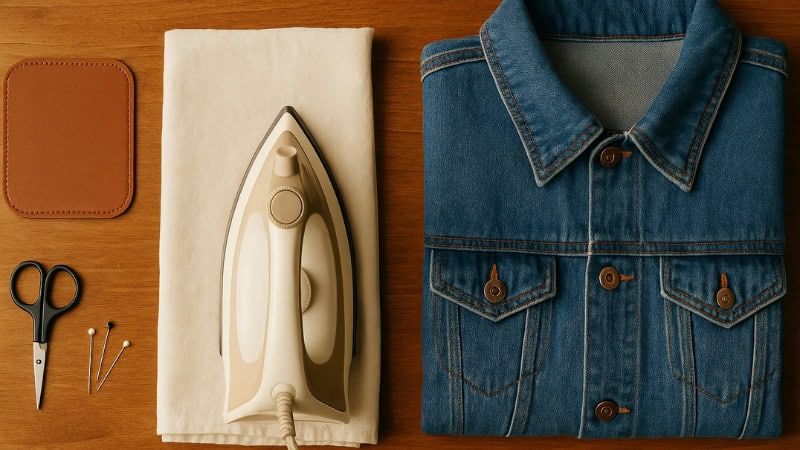
What you’ll need and why:
- Leather patch (with iron-on backing): The star of the show. That pre-applied adhesive melts under heat and bonds to fabric.
- Garment or item: Denim jackets, canvas totes, work shirts, caps—sturdy, tightly woven fabrics hold best and keep edges crisp.
- Thin cloth or pressing cloth (e.g., cotton pillowcase): This is your shield. It diffuses heat and protects leather from scorching or imprints.
- Iron (no steam): Dry heat is key. Steam introduces moisture that weakens the bond and can cloud the leather’s finish.
- Hard, flat ironing surface: A solid tabletop or firm ironing board ensures even pressure. Soft or padded surfaces let the patch shift and reduce adhesion.
Pro tip: Preheat the iron while you lay everything out. Having consistent, ready heat helps the adhesive activate evenly and avoids repeated presses that can over-dry the leather.
With these pieces in place, you’re set to move smoothly into placement and pressing.
Recommended Read: Best Way to Clean Leather: The Ultimate Leather Cleaning Guide
Prepare the Surface
Before you start pressing, make sure everything beneath your patch is clean, flat, and ready for heat. Here’s how to set it up the right way:
1. Clean the area
Wipe down the spot where your patch will go. Any lint, dust, or oil can block the adhesive from sticking properly. A quick brush or damp cloth works fine—just let it dry completely.
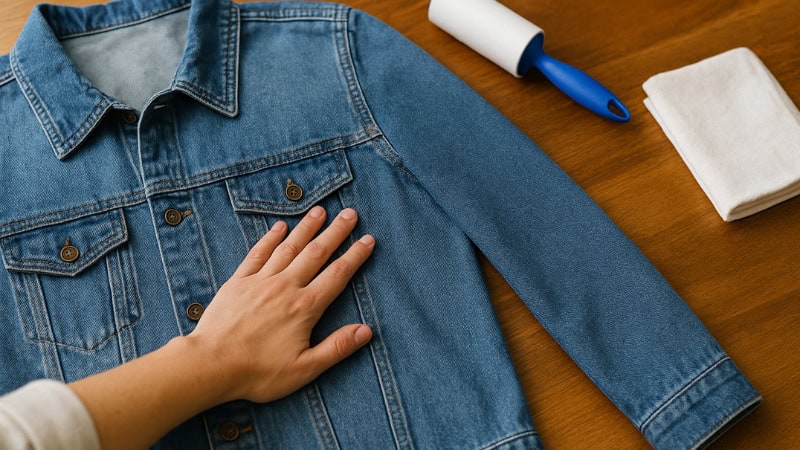
2. Lay the garment flat
Spread the fabric evenly on your ironing surface. Smooth out wrinkles with your hands or a light press from the iron. The flatter the base, the neater the bond.
3. Keep it stable
Work on a firm, heat-safe surface. Avoid thick padding or soft covers; they absorb pressure and stop heat from spreading evenly.
4. Preheat your iron
Turn on your iron now so it’s hot and steady when you need it. A consistent temperature improves adhesion and helps prevent later reheating.
Once your surface is clean, smooth, and firm, you’re all set to move on to the fun part—positioning your patch perfectly.
Position the Patch
Getting the placement right is key—once the heat is on, there’s no going back. Follow these quick points to position your patch perfectly:
- Lay the garment flat. Make sure the fabric is smooth and wrinkle-free before placing anything down.
- Choose the spot. Think about visibility and balance—patches stand out best on pockets, sleeves, or centered areas.
- Place the patch adhesive side down. The shiny or slightly rough side faces the fabric; that’s the side that will melt and bond.
- Secure it lightly. If needed, use a small piece of heat-resistant tape or gently hold the patch in place to prevent slipping.
- Double-check alignment. Step back, look at it from different angles, and make sure it’s exactly where you want it before moving on.
Once you’re satisfied with the placement, it’s time for the next crucial step—protecting the leather before applying heat.
Protect the Leather
Before you press that hot iron down, it’s time to safeguard your patch. Leather doesn’t like direct heat—it can scorch, shrink, or lose its smooth finish if you’re not careful. This step is all about creating a buffer between the heat and the leather so your patch bonds cleanly without damage.
1. Use a pressing cloth
Place a thin cotton cloth (a pillowcase or clean handkerchief works perfectly) over the patch. This protective layer spreads the heat evenly and keeps the iron from touching the leather surface directly.
2. Double-check your setup
Ensure the patch hasn’t shifted under the cloth. Once covered, peek under one corner to confirm it’s still aligned just right.
3. Test the heat
Before going all in, press the iron lightly on a covered corner for a few seconds to make sure the heat isn’t too high. Leather reacts quickly—if you smell anything odd or see darkening, lower the temperature slightly.
4. Avoid moisture
Keep the steam setting off. Steam can seep into the adhesive layer and cause bubbling or weak spots in the bond.
By protecting your patch before applying full heat, you’re ensuring the leather stays supple, smooth, and ready to adhere beautifully in the next step.
Apply Heat
This is where the real magic happens—bonding your patch to the fabric. The goal is to activate the adhesive without damaging the leather. With a steady hand and the right amount of heat, you’ll get a clean, professional hold.
1. Set the right temperature
Turn your iron to medium heat (around 250–300°F / 120–150°C). High heat can scorch leather, while low heat won’t activate the glue. No steam—keep it dry and steady.
2. Press, don’t glide
Place the iron directly over the covered patch and press down firmly. Hold it in place for about 20–30 seconds. Resist the urge to move the iron back and forth—movement can shift the patch and create uneven adhesion.
3. Apply even pressure
Make sure the entire patch area is getting contact through the pressing cloth. If it’s large, press in sections rather than trying to cover it all at once.
4. Let the adhesive do its work
As the heat builds, the glue backing melts and seeps slightly into the fabric, forming a tight bond. You might notice a faint warmth spreading through the cloth—that’s your cue that it’s bonding properly.
Once the time’s up, lift the iron straight up instead of sliding it off. That helps keep edges clean and prevents smearing the softened glue.
Next, you’ll check the seal and give your patch a final touch to lock it in place.
Check and Repeat if Needed
You’ve pressed and bonded your patch—now it’s time to see if the heat did its job. This step ensures the patch stays put for the long haul and looks neat from every angle.
1. Let it cool slightly
Wait about 30 seconds before touching the area. The adhesive is still soft while hot, so moving the fabric too soon could shift the patch.
2. Test the edges
Gently lift the edge of the pressing cloth and run a finger around the patch’s border. If any corners peel up or feel loose, don’t panic—that’s common, especially with thicker leather or fabric.
3. Reapply heat where needed
Cover the patch again with your pressing cloth and press for another 10–15 seconds on any loose spots. Use firm, even pressure—no sliding.
4. Check the bond again
Once everything feels secure, let the patch sit undisturbed for a few minutes to fully set. The adhesive strengthens as it cools.
At this point, your patch should look clean, flat, and firmly attached. Up next, you’ll finish with the cooling process and optional reinforcement for extra durability.
Let It Cool
Patience pays off here. After all that careful pressing, you want the adhesive to set completely so your patch holds tight for good.
1. Hands off for a few minutes
Let the patch and fabric cool naturally for 5–10 minutes. Don’t fan it, don’t tug at it, and definitely don’t try to test its strength while it’s still warm. The adhesive needs time to harden and form a lasting bond.
2. Check the finish
Once it’s cool to the touch, inspect the patch closely. The edges should lie flat and smooth against the fabric, with no bubbling or lifting. If everything looks clean, the attachment is solid.
3. Avoid washing right away
Give your garment at least 24 hours before washing or heavy use. This waiting period helps the adhesive cure fully, keeping the patch secure through wear and wash cycles.
4. Optional touch-up
If you spot any corners that still feel slightly loose, re-cover with your pressing cloth and give a quick 10-second press to reinforce the seal.
When the surface feels cool and firm, your patch is officially bonded. But if you want it to last through years of wear, there’s one final step that adds extra strength and polish—reinforcement stitching.
Reinforce the Patch

Your patch is firmly attached now—but if you want it to stay put through countless washes, road trips, or adventures, a little reinforcement goes a long way. Sewing around the edges not only strengthens the hold but also gives a clean, finished look.
1. Choose your thread wisely
Pick a strong, matching thread—polyester or heavy-duty nylon works best. Try to match the color of the patch’s edge or the garment so the stitches blend in seamlessly.
2. Use the right needle
If you’re sewing by machine, go for a leather or denim needle. These are sturdier and can pierce through both the leather and fabric without snapping. For hand-sewing, a sharp needle and thimble will help you guide each stitch with control.
3. Stitch around the edge
Sew close to the patch’s border using a straight or zigzag stitch. Keep your stitches short and even to secure every bit of the perimeter. The goal is to catch both the fabric and a thin edge of the leather without puckering.
4. Finish strong
Once you complete the loop, tie off or backstitch to lock the thread in place. Snip any loose ends for a tidy look.
5. Admire your work
Give your garment a final once-over. The patch should look smooth, stylish, and professionally finished—ready to show off or withstand daily wear.
With that, you’re done. You’ve successfully applied and reinforced your leather patch—no wrinkles, no peeling, just a solid bond that looks great and lasts.
Final Touches and Care Tips
You’ve done it — your leather patch is attached, smooth, and secure. But to make sure it stays that way for the long haul, a few final steps and maintenance habits can keep it looking brand-new.
1. Give it a gentle test
Once everything has cooled and set, flex the fabric gently around the patch. This helps you confirm that the adhesive is fully bonded and that no edges lift. If something feels loose, go back with your pressing cloth and give a short, firm reheat for 10 seconds.
2. Let it rest before use
Avoid washing, stretching, or wearing the garment for at least 24 hours. This curing time allows the glue to harden completely and reach its maximum hold.
3. Clean with care
When it’s time to wash, always turn the item inside out and use cold water on a gentle cycle. Air-drying is best—heat from dryers can weaken the adhesive over time. If it’s a jacket or bag, spot-cleaning with a damp cloth is the safest option.
Recommended Read: How to Condition Leather the Right Way
4. Condition occasionally
Leather loves a bit of care. Wipe the patch occasionally with a soft cloth and a small dab of leather conditioner to keep it supple and prevent cracking.
5. Enjoy your custom look
That’s it! You’ve added a sleek, personal touch to your item that’s built to last. Whether it’s a jacket, tote, or work shirt, your patch adds a story—and a little style—wherever you go.
Troubleshooting and Extra Tips
Even with careful steps, sometimes patches can be a little stubborn. Don’t worry—these quick fixes and pro tricks will help you handle common issues and make every future patching project smoother.
1. The patch isn’t sticking well
If the edges start lifting after cooling, it usually means the adhesive didn’t get enough heat or pressure. Cover it again with your pressing cloth and reapply firm, even pressure for another 15–20 seconds. Make sure your iron’s steam setting is still off.
2. Leather looks scorched or shiny
Too much heat can slightly darken or gloss the leather surface. Next time, lower the iron temperature a notch and extend your press time slightly instead. Always use your pressing cloth—it’s your leather’s best friend.
3. Patch shifted during ironing
This happens if the adhesive softens before it bonds. Before you start, secure your patch with a bit of heat-resistant tape or a couple of pins through the cloth (not the leather). That keeps it locked in place when you press.
Recommended Read: Self-Adhesive Leather Patch Repair – A Comprehensive Review
4. Adhesive bled onto fabric
If a bit of glue seeped out, let it cool first—then gently scrape it off with a dull edge (like a butter knife) or rub it away using a cloth dipped in rubbing alcohol. Be gentle to avoid pulling up the patch.
5. For heavy wear or washing
If your item is something that gets used a lot—like a backpack, work jacket, or jeans—reinforcing the patch with a few stitches around the edges will make it practically indestructible.
6. Keep experimenting
Different fabrics and patch backings behave differently. Don’t hesitate to test on a scrap piece first if you’re unsure about heat levels or timing.
You’ve now mastered not just how to attach, but how to troubleshoot and maintain your leather patches like a pro. They’ll stay looking sharp, durable, and full of character for years to come.
A Quick Recap
- Gather all your materials and set up a firm, clean workspace.
- Prepare the surface so the adhesive bonds smoothly.
- Position your patch carefully—alignment matters.
- Protect the leather with a pressing cloth and apply dry, medium heat.
- Check your work, reheat any loose edges, and let it cool completely.
- Reinforce with stitching for extra strength, and treat the leather gently afterward.
Make Your Leather Patch a Craft That Lasts
You’ve learned every step it takes to attach a leather patch that looks sharp, feels secure, and stands up to time. What started as a simple DIY project now has the polish of professional craftsmanship.
A well-attached patch isn’t just decoration—it’s personality. Whether you’re reviving an old jacket, customizing a tote, or adding flair to work gear, it’s a creative, lasting way to express yourself.
Leather ages beautifully. The more you wear and handle it, the more character it gains. With a bit of care—gentle cleaning, no harsh heat, and occasional conditioning—your patch will stay looking timeless for years.
