
Keeping your car’s leather seats clean isn’t just about looks—it’s about preserving one of the most premium parts of your interior. Leather can crack, fade, or stiffen if not cared for properly, but with the right approach, maintenance becomes simple and satisfying.
Many car owners worry about damaging their seats with the wrong products. The good news? Cleaning leather is easy when you understand the basics. With a few gentle tools and consistent habits, you can keep your upholstery looking fresh for years.
Let’s walk through the process step by step so you always feel confident caring for your leather interior. Before diving deeper, we’ll start by gathering the essential supplies you’ll need.
What You’ll Need Before You Start
Caring for leather upholstery begins with having the right tools on hand. Using improper products or abrasive materials can damage leather, so sticking to gentle, purpose-made items matters. Below is a simple list of everything you should prepare in advance to make the cleaning process smooth and efficient.
Gather these supplies:
- Soft microfiber cloths
- Soft-bristle detailing brush
- Vacuum cleaner with a soft brush attachment
- pH-balanced leather cleaner
- High-quality leather conditioner
- Optional: leather protectant spray
Having these essentials ready ensures that the cleaning process goes quickly and prevents you from pausing midway to look for tools or substitutes. Now that you know what to assemble, it’s time to prepare your car interior for cleaning.

Prepare Your Car Interior the Right Way
Before applying any cleaner, a quick setup helps ensure you avoid rubbing dirt deeper into the leather. Proper preparation clears loose debris and makes the following steps much more effective. Even a few minutes of prep work can dramatically improve your results.
Here’s how to get your car ready:
- Park in a shaded area so products don’t dry too fast.
- Open your car doors for ventilation.
- Remove any items, coverings, or accessories from the seats.
- Vacuum thoroughly using a soft brush attachment, focusing on seams and creases where dirt settles.
This prep work prevents scratches and gives you a clean surface to work with, making the upcoming cleaning steps much easier and more efficient. Once your car upholstery is free from dust and debris, it’s time to test your cleaning products safely.
Test Products on a Small Area First
Testing your leather cleaner before full application is a simple but important step. Every car’s leather varies slightly in finish and sensitivity, so this test helps ensure the cleaner won’t discolor or damage your upholstery. It only takes a moment and brings peace of mind.
Follow these quick steps:
- Choose a hidden area such as the underside of a seat or a lower side panel.
- Apply a tiny amount of cleaner with a microfiber cloth.
- Let it sit for a minute, then wipe it away.
- Check for any changes in color or texture.
If the leather looks unchanged, you’re safe to continue. With your products verified, you can now proceed to clean the seats confidently and effectively.
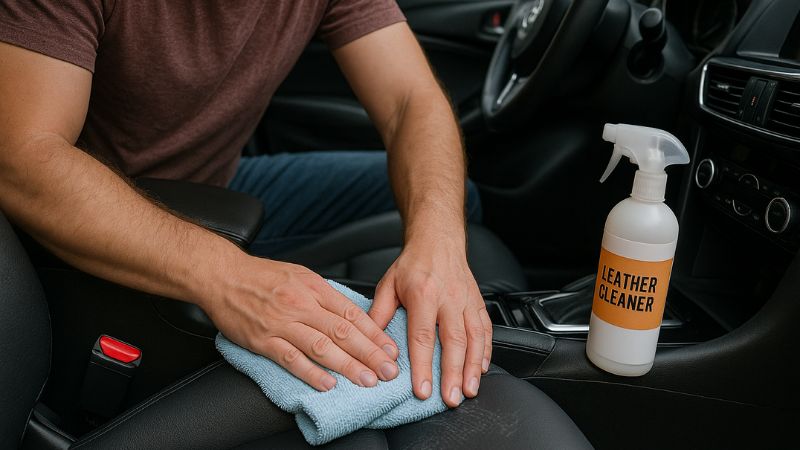
Clean the Leather Gently and Thoroughly
This is where the real transformation happens. Cleaning leather isn’t about scrubbing aggressively—it’s about working gently to lift dirt without harming the surface. Using the right motions and techniques will leave your seats looking refreshed without wearing them down.
Here’s the step-by-step process:
- Apply the leather cleaner to a microfiber cloth, not directly onto the seat.
- Work in small sections so the cleaner doesn’t dry too quickly.
- Use soft circular motions to lift dirt gently.
- For deeper grime or seams, use a soft-bristle detailing brush with light pressure.
- Wipe away residue immediately with a clean, dry cloth.
Once your seats look clean and even, you’re ready for the next crucial step—conditioning the leather to keep it soft and protected.
Condition the Leather for Lasting Softness
Cleaning removes dirt, but conditioning restores the natural oils leather needs to stay supple. Without conditioning, leather can dry, crack, and lose its luxurious feel. The process is easy as long as you apply the product evenly and let it absorb fully.
To condition properly:
- Squeeze a small amount of conditioner onto a clean cloth.
- Work it into the leather using light, even strokes.
- Allow the product to absorb for the recommended time on the label.
- Buff away excess with a fresh microfiber cloth for a smooth finish.
Conditioning rejuvenates your leather and enhances its lifespan, and with your seats now treated, you can choose to add an extra layer of protection for even better durability.
Recommended Leather: How to Seal Leather after Dyeing
Adding a Leather Protectant is Better
For drivers who want their upholstery to resist UV rays, spills, and premature wear, a leather protectant is an excellent extra step. This finishing touch adds a barrier that helps keep your seats looking pristine even with daily use.
To apply:
- Lightly mist the protectant onto a microfiber cloth.
- Spread it evenly over the leather surface.
- Allow it to dry according to the product instructions.
Adding a protectant provides peace of mind, especially if your car sits in the sun or you have kids or pets. With protection in place, let’s move on to keeping your leather in great condition long-term.
Maintenance Tips to Keep Leather Looking New
Maintaining leather upholstery doesn’t require constant effort—just small, consistent habits. Regular care helps prevent scratches, dryness, and discoloration, keeping your seats looking beautiful without heavy cleaning sessions.
Try these upkeep habits:
- Lightly wipe down seats every 2–4 weeks.
- Deep clean and condition every 3–6 months.
- Avoid sharp objects or abrasive materials on your seats.
- Keep your car parked in shade or use sunshades to prevent fading.
- Never use household cleaners—the chemicals can permanently damage leather.
Following these simple steps ensures your upholstery stays healthy and stylish, and now you’re ready to explore some common questions drivers often have about leather care.
FAQs
How often should I clean leather car seats?
Cleaning lightly every few weeks is enough for most vehicles. A deeper clean and conditioning every 3–6 months helps maintain softness and prevent cracking. If your car sees heavy use, you may need to clean more frequently. Adjust based on your environment and driving habits.
Can I use household cleaners on leather?
No—household cleaners like bleach, ammonia, or all-purpose sprays can strip natural oils and damage the leather. Always use pH-balanced leather products designed specifically for car interiors. These protect the material rather than drying it out. Avoid shortcuts to save your upholstery long-term.
What’s the best way to remove stains from leather seats?
Use a leather-safe cleaner and gently work the stain in small circles. Never scrub aggressively; it can spread the stain or damage the finish. For tough stains, a soft detailing brush can help lift dirt. If the stain persists, professional detailing may be needed.
Why is conditioning leather so important?
Leather naturally loses oils over time, especially in warm climates. Conditioning restores moisture and flexibility, preventing cracking and stiffness. It also enhances the natural finish and keeps the seats feeling soft. Skipping this step shortens the lifespan of the upholstery.
Can I use baby wipes on leather?
Baby wipes may seem gentle, but they contain chemicals that can break down leather over time. While they might clean lightly, they’re not safe for long-term use. Stick to products formulated for leather care. Proper cleaners maintain both appearance and durability.
What should I do if the leather starts cracking?
Small surface cracks may improve with conditioning, but deeper cracks often require professional repair. Increasing the frequency of conditioning can prevent new cracks from forming. Keep the seats out of harsh sunlight when possible. Early intervention always leads to better results.
Do leather protectants really make a difference?
Yes—protectants help shield the seats from UV rays, spills, and friction. They act as an invisible barrier, slowing down wear and fading. This is especially useful for cars parked outdoors. Regular use enhances longevity and keeps the interior looking new.
A Fresh Interior Starts With Simple Care
Caring for your car’s leather upholstery doesn’t have to feel complicated. By using gentle tools and the right products, you can keep your seats looking smooth, clean, and luxurious for years. A little consistency goes a long way.
With these steps in mind, you’re now equipped to maintain your leather interior effortlessly and confidently. Enjoy the comfort of well-cared-for seats every time you drive.